Welcome to Part 7 of the WebWiskee Success Series, where we’re talking about design elements. Specifically, color and images. Google may read all the words, but people are often more interested in how things look.
Today we’re going to dig in on some of the visual elements for your website—choosing a color palette and our favorite places to get photos.
This content is designed to prepare you for the technical build of your WebWiskee website. If you missed Parts 1 – 6 we’ve linked to them at the end of this post, so you can catch up.

Having a visually-appealing website that SHOWS who you are is good business because it increases engagement dramatically. Remember the exercises we sent you on determining your brand voice and tone? Visual elements can contribute to tone as well, so it’s important to get them right!

Choosing A Color Palette
Your color palette should be consistent on everything you use to market your company. Choosing different colors whenever you feel like it will lead to a messy-looking brand.
There are a few different types of color palettes.
- MONOCHROMATIC – using different shades of the same color
- ANALOGOUS – colors close to each other on the color wheel
- COMPLEMENTARY – colors opposite each other on the color wheel
- TRIADIC – color palettes comprised of 3 main colors
Now, we could all fall down the rabbit hole of color theory or color psychology, but let’s not do that today. Let’s focus on choosing colors for your website that fit your business’s tone and voice.
Look to companies you aspire to be like and take note of their color palettes. Do they provide any inspiration for you, or do they cause you to want to go in your own unique direction?
WHY IT MATTERS: Colors influence what visitors to your website think about your brand and help to tell a visual story about who you are and how you can help them.
Color Resources
There are many tools available for building a color palette but where do you start? You could start with a favorite color, a color you look great wearing, or use color psychology to choose your primary colors. Here are easy tips to keep in mind.
- Colors should match the feel and style of your company’s brand.
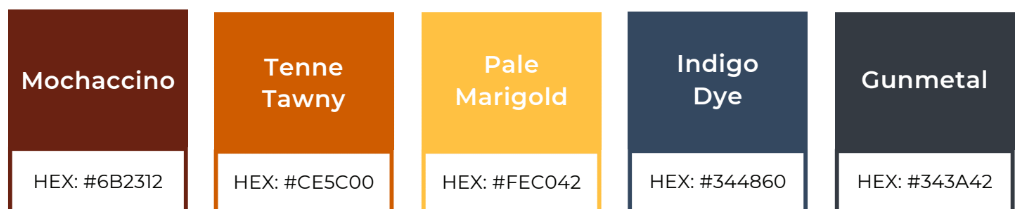
- Pick two main colors that you like the look of and then choose an additional 2 or 3 as accent colors to round out your color palette.
- You do not need to use all of the colors all at once.
There are a lots of awesome resources to help you decide on a color palette. Here are some great tools for choosing a color palette that feels right for your company and your brand.
These are just a few of many that can help you drill down on which colors you’d like to use, if you haven’t done so already. Use these colors in your graphics, logos, icons, and call to action buttons.
WHY DOES IT MATTER? Having a clear, set color palette will help you make design decisions on everything from your website build, to print materials, to what you post on social media.
What The Heck Are Hex Codes?
All colors have a HEX code. Basically, it’s a 6 digit number that allows you to choose an exact color for use on the web. Not all monitors or devices display colors in the same exact way, so using a HEX code will ensure your colors are consistent, even if individually there might be slight variations in how they’re displayed.
WHY THIS MATTERS: Having this code can make it so much easier to be consistent with your business colors.
After you’ve decided on your color palette, it’s time to think about your website’s photography. You may have specific photos already, such as pictures of your products, your team, the building you’re in, etc.
But what about the photos on your website that are in place as design elements more than anything else? Think about the websites you visit. Most of them likely have photos across the top of every page, or use them as a way to break up text on pages.

Photos As Design Elements
When you start thinking about all of the places you’ll likely need to add photos, you may realize you need more of them. However, when it comes to using them on your website, not all photos will work for you. There are definitely some things you should know about size and quality.
You’ll want to have plenty of photos that are horizontal, or in landscape orientation. These are perfect for use on desktop devices, so that they can fit from side to side if you’d like, but they also crop nicely when viewed on phones and tablets.
- Make sure all of your images are at least 1,600 pixels wide for best quality.
- You want to ensure that your image is either a jpeg or a png file for use on your site.
- You’ll want to make sure your file size is 1MB or less, because if your file is too big it eats into your storage space and can eventually slow your website down.
This is not to say that there won’t be a need for vertical, portrait oriented images, but horizontal photos tend to be used much more frequently.

Where Should You Get Images FOR YOUR WEBSITE?
Great quality photos can turn a site that is just OK into something truly awesome. When people are really wowed by a site, it’s often the photos that dazzle them and not the layout or the technical features.
- Hire a professional photographer to create custom images for your website
- DIY your own photography
- Legally source stock images and icons
Depending on your budget and skill with a camera, the first two options might not be a fit for you, which would leave you with option 3… sourcing stock photos.

Avoid Getting Sued
There are lots of ways to get images, but one thing that you should never do is just “google” an image and use it without permission. All images are automatically copyrighted to the creator, photographer, or artist and those images are their legal property.
If you grab a random image off the internet, you put yourself in a position of getting sued for copyright infringement, which can carry some big fines. Just. Don’t. Do. It.
Free Photo Sources
| But what are your options to get photos that are legal to use on your site? We’re glad you asked! While there are lots of paid options for stock photos out there, unless you need a photo that is very, very specific, chances are good that you’ll find something on a free photo site that allows you to use photos under the Creative Commons licenses. (Be sure to double check permissions for each individual photo.) |
| Here are a few of our favorites: Unsplash Pixabay Pexels ReShot StockVault Gratisography – known for quirky, unique images FoodiesFeed – great for food photography |
Searching Through Stock Images
The biggest stock photography sites have hundreds of millions of images available to their users. How on earth will you choose?
Search by color – you just picked your color palette, right? Try searching for one of those colors. Here’s an example of a website that did just that by searching for the color blue.
Search by topic – you can start off with a broad search for something like “lighthouses” and then refine your search as needed, and search “Maine lighthouses.”
Search by person – just like it sounds.

What To Choose
Think about what you would like to show visitors to your site. What’s the image of your business that you’d like to convey? Is your company playful? Professional? Think back to the exercise you did to develop your brand voice and make sure the photos are in alignment with it.
You’ll also want to consider your target customer. What would appeal to them? If you want to include pictures of people, make sure they represent the full range of your target audience. They should recognize themselves when they see the images. For example, if you want to attract stay-at-home moms, make sure to show some stay-at-home moms.
Are you the face of your brand? Make sure images of you and your team are of good quality and represent your brand.
Cutting yourself out of that picture from your sister’s wedding, or a selfie in your bathroom won’t cut it. Remember you are a representative for your brand, so the colors in your photographs should play nicely with your brand colors. Wearing orange on your purple website could look off. In addition to making sure your personal photos look great, you’ll likely still want to source some stock photos to round out your website’s design elements.
After your search and as you make your selections, keep your color palette in mind. Will this photo fit in with your brand’s colors and look cohesive, or will it look out of place and kind of messy?
WHY IT MATTERS. Choosing photos that compliment your color palette and overall tone of voice will help you present your brand the way you want it and make for a beautiful website.
We covered a lot today, but it’s all so important, and will take your website from “pretty good” to “fantastic!”
In our next post in this series, we’re going to continue talking about photos. Keeping them organized, getting them optimized so that Google can see them too, and addressing ADA compliance—something every website is now legally required to adhere to.
If you missed any of the posts and exercises to prepare you for your website build, be sure to catch up!
The WebWiskee Success Series
WebWiskee Success Series Part 1 – Targeting Your Ideal Customer
WebWiskee Success Series Part 2 – Your Business’s Super Power
WebWiskee Success Series Part 3 – Keywords: The Key To A Successful Website
WebWiskee Success Series Part 4 – How To Write Your Website Copy
WebWiskee Success Series Part 5 – How To Craft Your Customer Journey
WebWiskee Success Series Part 6 – How To Write Your Story
WebWiskee Success Series Part 7 – How to Choose Your Website’s Color Palette and Photos
WebWiskee Success Series Part 8 – How To Optimize Your Photos For SEO and Accessibility
WebWiskee Success Series Part 9 – How To Develop Your Website’s Sitemap